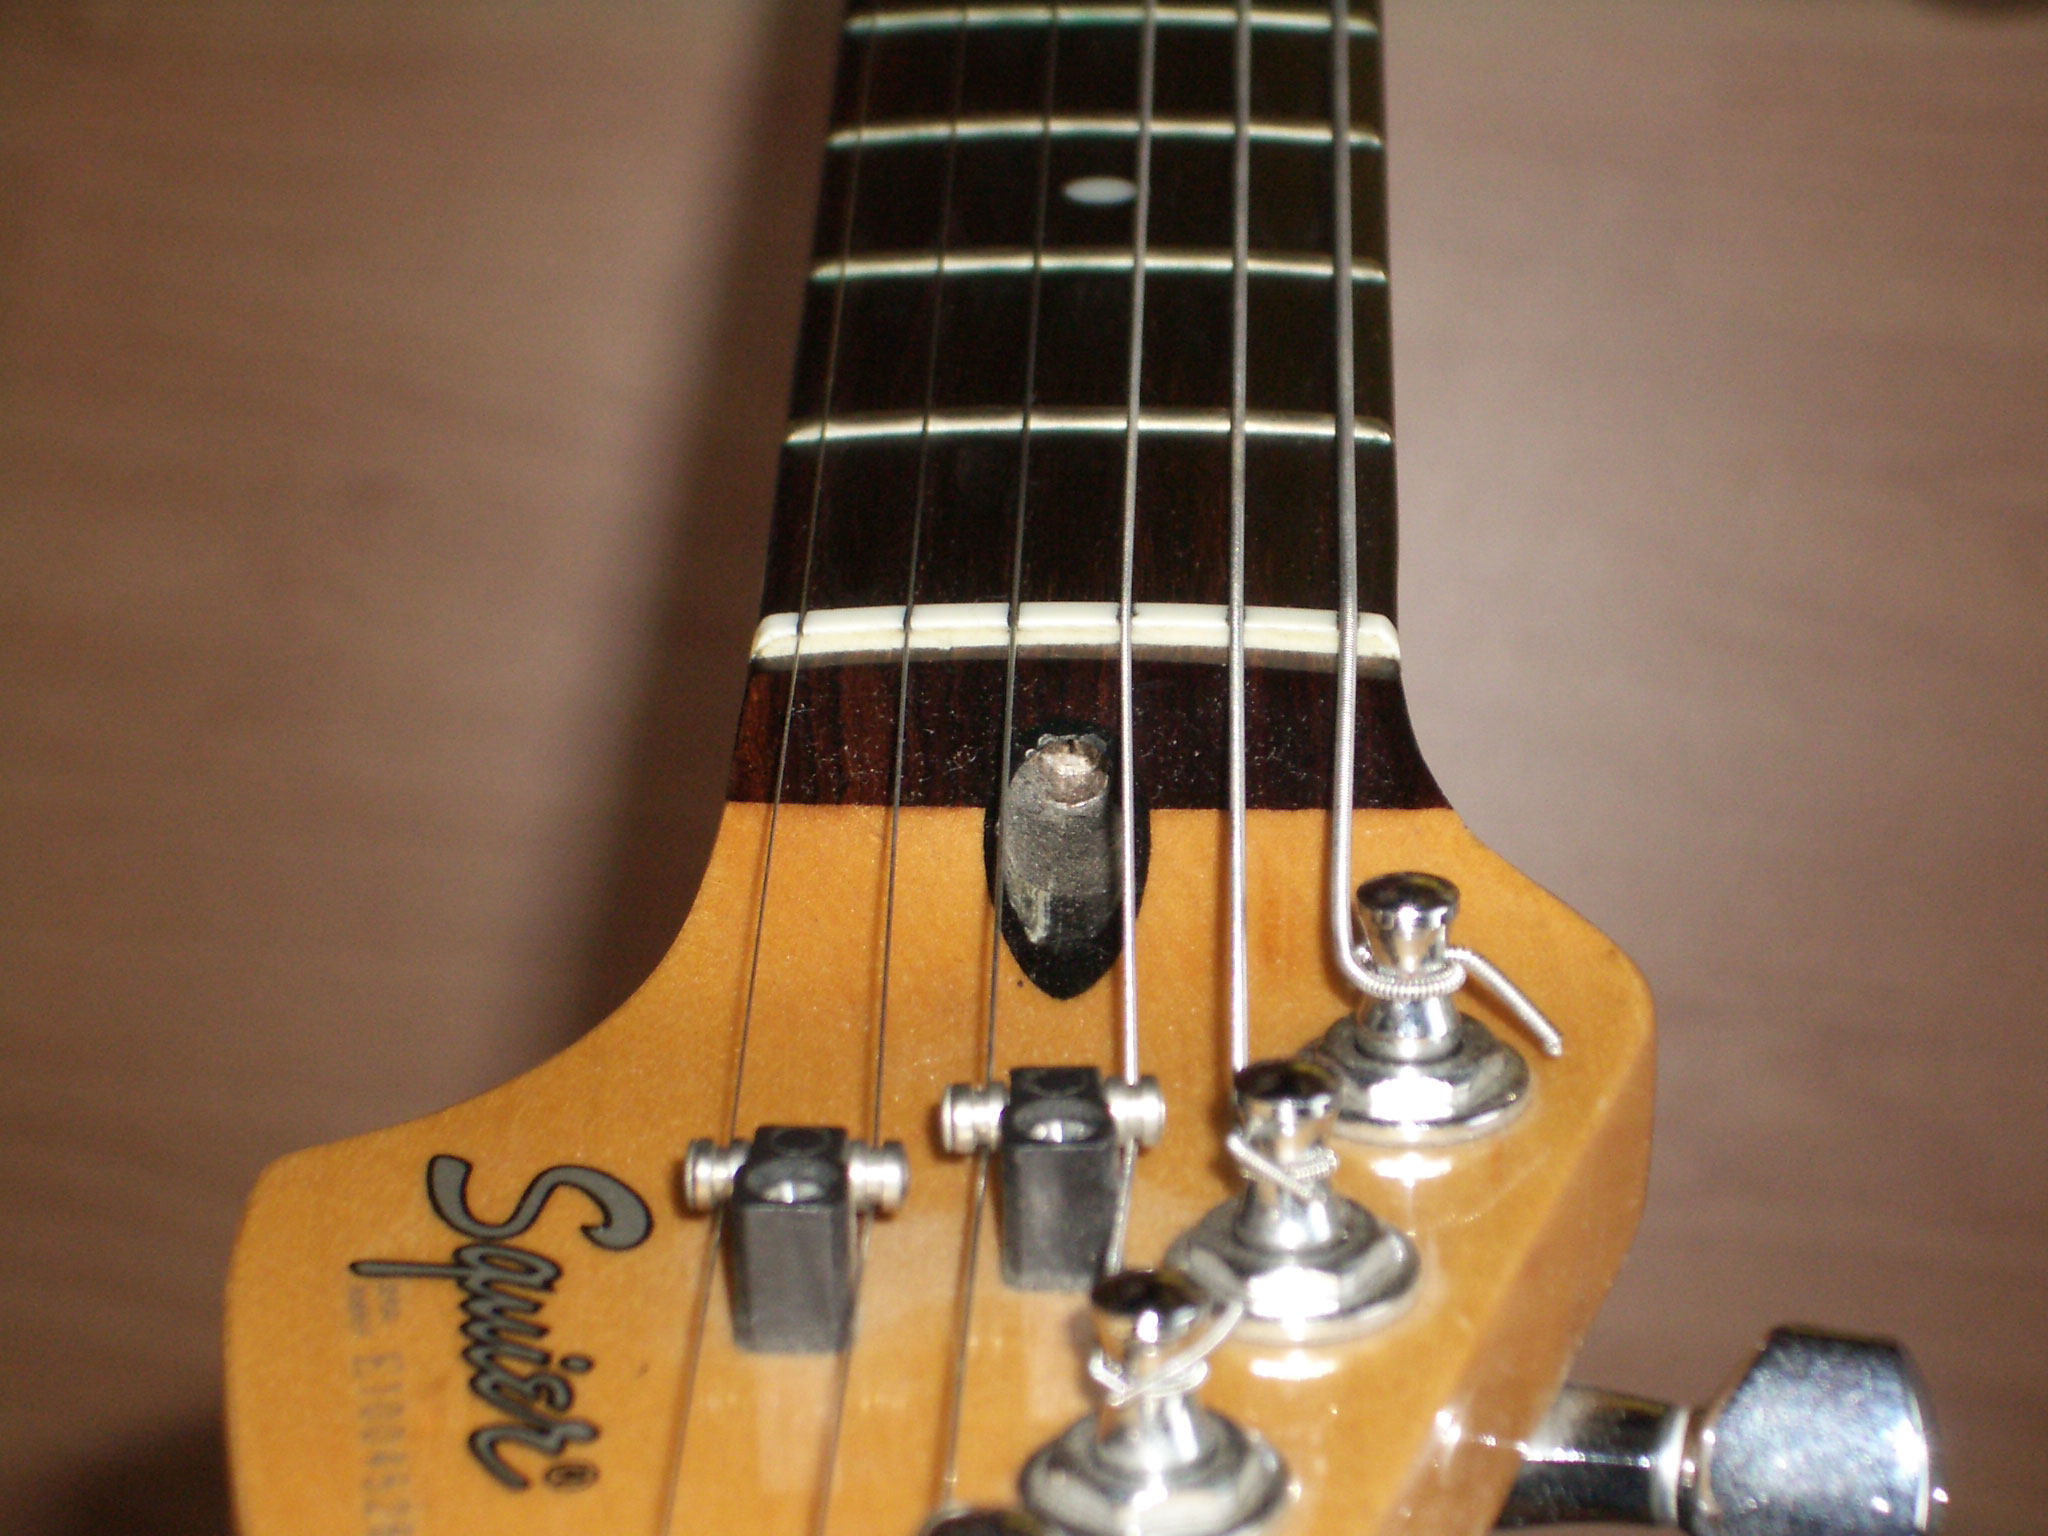
Tag: luthier tips

  • End Fret Buzz: Pinpoint Problem Frets with the Fret Rocker

    That frustrating, tell-tale buzz. You know the sound.

    A close-up of the StewMac Fret Rocker tool, a small, precision straight edge.

    Whether it’s an open string ringing sour or a note dying out on the fretboard, persistent fret buzz is a common plague for guitarists. It ruins tone, compromises playability, and can drive even the most patient musician to distraction.

    The main culprits are almost always frets that are either too high or too low. Pinpointing the exact offender, however, can feel like a game of whack-a-mole. You could end up chasing your tail, taking material off one fret only to find the next one is now wrong. It would be a nightmare pursuit trying to guess and play around with it.

    For the serious hobbyist aiming for professional results, precision matters. This guide introduces the Fret Rocker, an essential tool for accurately diagnosing fret issues, and arms you with the knowledge to silence that buzz for good. You’ll gain the confidence that your guitar will play properly, and you can’t blame it for your bad playing!

    🎦 The Master’s Approach: Dan Erlewine and the Fret Rocker

    When it comes to essential guitar setup and repair, Dan Erlewine from StewMac is the master. In this video, he demonstrates his “Fret Rocker,” an ingenious tool designed to quickly identify problematic frets.

    Watch as he shows you the simple yet effective method for pinpointing the source of fret buzz.

    ✨ Engineered for Precision: What Makes the Fret Rocker Essential

    The Fret Rocker is a small, precision-ground straight edge specifically designed to quickly pinpoint high or low frets. Its method of use is deceptively simple: you span three frets at a time. If the tool rocks, you’ve found a problem area. But its true genius lies in its engineering:

    • Multiple Lengths: The Fret Rocker comes in short, medium, and long lengths, allowing it to accurately span three frets anywhere on the neck – from the narrowest spots near the nut to the wider areas over the body.
    • Unmatched Accuracy: These lengths are precision-ground to within **1 and a half thousandths of an inch**. This extreme accuracy is what separates it from improvised tools, ensuring your diagnosis is reliable.
    • Diagnostic Power: When the tool rocks, it indicates a problem with one of the three frets it spans. As Dan notes, “the chances are 50:50 each way” that it’s either a high fret or a low fret *next to* the point of contact. This precision tells you *where* to investigate further, rather than just guessing.

    This tool is so reliable it’s used on valuable instruments, including vintage guitars like the 1959 Gibson ES-125T (as seen in the video). This communicates a clear message: if it’s good enough for an expensive, valuable, historic guitar, it’s certainly reliable for yours.

    A close-up of the StewMac Fret Rocker being used on a guitar fretboard to check for high frets.

    💰 Precision vs. Penny-Pinching: The Fret Rocker’s True Value

    Many hobbyists consider alternatives like credit cards or homemade metal straight edges to check for high frets. While these DIY methods might offer a quick, low-cost starting point, they come with significant risks.

    A homemade tool could be out of tolerance, not perfectly flat, or could even introduce inaccuracies if you don’t know exactly what you’re doing. This can lead to inaccurate measurements and sloppy fret work, wasting your time and potentially damaging your instrument.

    For the serious hobbyist who values their time and strives for professional results, investing in a high-quality, purpose-built tool like the StewMac Fret Rocker is a “buy once, cry once” decision. It guarantees precision and consistency, eliminating guesswork and significantly reducing the risk of errors. The confidence you gain from knowing your diagnostic tool is perfectly accurate is invaluable.

    Ensure your fretwork starts with precision: StewMac Fret Rocker (Amazon).

    🔧 Beyond Detection: Your Next Steps to a Buzz-Free Neck

    Identifying a problem fret with the Fret Rocker is the crucial first step. To completely eliminate the buzz, you’ll need to follow up with a few more precise operations:

    1. Leveling:
      The identified high or low fret (or frets) needs to be carefully leveled to match the height of its neighbors. This often involves a precision filing tool.
    2. Crowning (Reshaping):
      Once the fret is level, it must be reshaped to its proper “crown” profile. This is vital for proper intonation and preventing string contact across too wide an area. A specialized crowning file is essential for this. We recommend the StewMac Compact Z-File Guitar Fret Crowning File (Amazon) for its efficiency.
    3. Polishing:
      Finally, the frets must be polished to a smooth, mirror-like shine. This removes any file marks and ensures effortless string bending and vibrato. Always use fret protection like the StewMac Fingerboard Guards (Amazon) to protect your fretboard during these steps.

    🏆 The Payoff: Play with Confidence, Craft with Precision

    Eliminating fret buzz transforms your playing experience, allowing your guitar to truly sing. The Fret Rocker empowers you to diagnose problems with absolute confidence, setting the stage for precise, effective repairs. The satisfaction of doing this work yourself, knowing your guitar plays perfectly because of your own accurate efforts, is immeasurable. It’s a testament to your mastery and dedication as a craftsman.

    What’s your most stubborn fret buzz story, and how did you finally silence it? Share your experience below.

  • Mini Cam Clamps: Precision Clamping for Fragile Pieces in Tight Spaces

    You’re deep inside your guitar, trying to clamp a loose brace, but your traditional clamps are fighting you every step of the way.

    A close-up view inside an acoustic guitar, showing internal bracing and a repair area.

    You squeeze, pump, and wrestle, but the clamp either won’t do up tight enough, or the little rubber pads keep sliding off, forcing you to constantly check and readjust. Even worse, if you’re working near a taller brace, your clamp “contacting here and bottoms out” before it can even touch the piece you actually need to fix. This isn’t just frustrating; it’s a direct threat to your delicate repair, risking damage to the guitar’s top from excessive weight or imprecise pressure. As fellow craftsmen, we know that an improvised setup is a recipe for wasted time and potential disaster. We want tools that remove all doubt, allowing us to focus entirely on the craft. The goal isn’t just a successful repair; it’s the profound confidence that comes from using a tool perfectly designed for the job. You can make your own tools, but the right ones from the right place inspire confidence.

    🎦 The Master’s Viewpoint: Dan Erlewine’s Elegant Solution

    When it comes to solving common luthier frustrations, Dan Erlewine from StewMac is the master. In this essential video, he introduces his innovative Mini Cam Clamps, revealing how they solve the very problems that plague traditional clamps when working inside a guitar. Pay attention to the subtle genius of their design—it’s the kind of detail that transforms a difficult job into a precise repair.

    ✨ The ‘Aha!’ Moment: It’s All in the Jaw’s Design

    The true genius of Dan Erlewine’s Mini Cam Clamps lies in a seemingly small, yet profoundly impactful, design feature: the **cutaway on the lower jaw**. This isn’t just a cosmetic detail; it’s the specific innovation that allows these clamps to:

    • Reach Over Obstructions: Unlike traditional clamps that “bottom out” against adjacent, taller braces before making contact with the target, the cutaway allows the Mini Cam Clamp to clear these obstacles. This means you can effectively clamp the brace you actually need to fix, even in tight, obstructed internal spaces.
    • Apply Perfect Pressure: By preventing unwanted contact, the cutaway ensures that the clamping pressure is applied precisely where it’s needed—on the loose brace itself—rather than being diverted by other internal components. This guarantees a secure, effective bond.

    This design makes precision possible, transforming what could be a frustrating, ineffective clamping attempt into a clean, targeted repair.

    🛠️ Mini Cam Clamps: Lighter, Slimmer, More Versatile

    The StewMac Mini Cam Clamps, thin and light, shown in use on a guitar's internal bracing.

    Developed by Dan Erlewine himself, these Mini Cam Clamps are a testament to purpose-built design. They offer the same easy adjustment as standard cam clamps—simply slide the upper jaw into position and flip the cam lever to tighten. But where they truly shine is in their size and versatility: they are **10 ounces lighter** and significantly slimmer than even StewMac’s smallest traditional cam clamps, making them ideal for:

    • Internal Guitar Work: Their thin profile (1/2″ width) allows them to navigate tight spaces within acoustic guitars for brace repairs, and even for bridge clamping.
    • Smaller Instruments: Perfect for ukuleles, mandolins, and other compact instruments where larger clamps are simply too bulky.
    • Delicate Components: The sturdy hardwood and cork jaw linings provide plenty of pressure without risking damage to fragile pieces like fingerboards, side splints, or thin instrument tops.
    • Multiple Clamp Placement: Their reduced weight and slimness mean you can fit more of them through a soundhole, enabling comprehensive, even clamping across a repair area.
    Comparison of StewMac Mini Cam Clamp vs. traditional cam clamp, highlighting the mini's smaller size and lighter weight.

    Photo: StewMac.com

    What Fellow Craftsmen Are Saying (and What to Know)

    User reviews confirm these clamps are “one of the most useful and usable tools in my shop,” with many expressing a desire to buy more due to their versatility. They’re praised for being “super lightweight but plenty strong,” “perfect fit, weight and tension for clamping bridge through the sound hole,” and “extremely versatile.”

    However, an “unimpeachable, nuanced truth” means acknowledging their specific applications. Users note they “are not particularly powerful” for heavy-duty crack closing, and some report that the cork pads can come loose (an easy fix with a little glue). A few also mentioned that while small, they might still not fit the soundhole of *every* ukulele kit. Despite these minor points, the overwhelming consensus is that these “little buggers are perfect” for their intended purpose, providing “precision placement and light pressure” for delicate operations.

    Make this cornerstone investment in your workshop today: StewMac Mini Cam Clamps (Amazon).

    🔦 See Clearly, Glue Strongly: Essential Supporting Tools

    Precise clamping often requires clear visibility and reliable adhesion. Here are two indispensable tools to complement your Mini Cam Clamps:

    1. Internal Inspection:
      To ensure your clamps are placed exactly where they need to be, especially within the guitar body, a good inspection light and mirror are crucial. The StewMac 3-Piece Inspection Mirror Kit (Amazon) and the StewMac Guitar Internal Inspection Light Kit (Amazon) provide the necessary visual access to ensure every clamp is perfectly positioned.
    2. Reliable Adhesion:
      For securely re-attaching braces, the industry standard is a high-quality wood glue. Titebond Original Wood Glue (2-Pack, Amazon) provides a strong, reliable bond that sets quickly, making it ideal for brace repair.

    📝 Workshop Wisdom: The Padded Body Support

    Beyond specialized tools, smart workshop habits drastically improve efficiency and safety. Dan Erlewine also demonstrates a simple yet effective **padded body support**. This ingenious accessory, which you can easily make yourself, consists of a padded block of wood attached to a dowel with cross holes and an indexing pin. Its primary purpose is to hold a guitar securely while it’s in your repair vise, or to quickly lift an instrument—like a customer’s old j45—off a dirty workbench surface in a hurry, providing a safe, clean spot for your valuable instrument.

    🏆 The Payoff: Clamping with Confidence

    The journey from frustration to flawless execution often begins with the right tool. By eliminating the struggles of generic clamps and embracing specialized solutions like the Mini Cam Clamps, you’re not just performing a better repair; you’re building your own confidence and sense of accomplishment as a craftsman. You know the tool will work as designed, allowing you to focus on the skill, not the struggle. That is the true prize.

    Have you ever found a clamp was too large for small or fragile work? Share your experience below.

  • Rescue Your Guitar’s Broken Truss Rod: A Pro’s Blueprint for Serious Hobbyists

    You reach for your truss rod wrench, but it just spins freely—or worse, gnaws away at a mangled, stripped nut that simply won’t budge.

    A close-up view of a stripped and damaged truss rod nut inside a guitar neck.

    Photo: Detlev Dördelmann (Wickler), CC BY-SA 2.0 DE, via Wikimedia Commons

    This isn’t just frustrating; it’s a critical injury to your guitar’s neck, compromising playability, action, and tone. For the dedicated instrument builder and serious hobbyist, a broken truss rod has historically meant complex, risky surgery—or the expense of a professional luthier. But what if you could fix it yourself, with professional precision, without the fear of irreversible damage?

    This guide taps into a master luthier’s insights, offering a pathway to repairing even severely damaged truss rods with game-changing specialized tools and techniques. What would typically be a “major drama” can be a surprisingly achievable fix. I’m like you, perhaps not a pro, but always striving for professional-level results. The key is to leverage the right tools and master a proven process, ensuring your skills aren’t held back by your equipment. Dan Erlewine, a titan in the lutherie world, recently demonstrated a repair that embodies this ethos, turning a daunting task into a manageable one.

    ▶️ The Master at Work: Fixing a Mangled Rod

    In this essential video, Dan Erlewine takes on a severely mangled truss rod, showing how he brings it back from the brink. His decades of experience are distilled into a clear, methodical approach that we can all learn from. Pay close attention to his steady hand and subtle insights—they are gold.

    🛠️ The Game-Changing Arsenal: StewMac’s Rescue Kit

    Before the existence of tools like these, repairing a damaged truss rod often meant dismantling a guitar’s neck—a truly daunting prospect.

    The brilliance of StewMac’s Truss Rod Rescue Tools lies in their ability to eliminate this “major surgery,” making the repair dramatically more accessible for us. It’s an investment that ensures you can achieve pro-level results, without the hassle of attempting complex, high-risk procedures.

    The core of the system is composed of two primary tools, along with crucial accessories:

    1. The 3/8-inch Cutter.
      This tool’s specific function is to bore away a minimal amount of wood around the damaged rod, precisely exposing unused or undamaged sections of the truss rod. It creates a clean pocket, allowing you access to the underlying problem without unnecessary material removal.
    2. The Thread Cutting Die.
      Once the cutter has opened access, this die fits perfectly into the newly created pocket. Its main purpose is to chase (clean up) mangled threads or cut entirely new threads on the truss rod, ensuring that a fresh adjusting nut can engage securely and properly.

    This ingenious two-part system is designed to remove the smallest amount of wood necessary, preserving the neck’s strength. You can acquire this essential kit here: StewMac Truss Rod Rescue Kit (Amazon).

    The StewMac Truss Rod Rescue Kit, showing the specialized cutter and thread die tools for guitar repair.

    🧰 The Fine Details: Tools & Techniques of a Master

    Mastering a repair isn’t just about the main tools; it’s about the nuances that separate an amateur job from a truly professional outcome. Dan’s process is full of them:

    1. Controlling Depth with Spacers.
      After cutting threads, it’s common to find the new nut doesn’t sit flush, making a truss rod cover impossible to install. Dan’s solution is the strategic use of thin **washers or “spacers.”** These polished metal pieces fit within the cutter’s cavity, allowing precise control over how deep the new adjusting nut sits. They also crucially provide a steel bearing surface for the nut, preventing it from crushing the wood of the neck. These vital parts are sold by StewMac and can typically be found on their main Truss Rod Rescue Tools & Parts page.
    2. Strategic Nut Selection.
      For depth issues, Dan demonstrates that sometimes a different type of nut is the answer. While longer Fender-style nuts offer more thread strength, he pivoted to a **Gibson-style acorn nut** because its smaller size allowed it to seat deeper into the neck, providing necessary clearance for a truss rod cover without requiring more wood removal from what is often a “weak area” of the neck. This thoughtful decision balances immediate solution with long-term structural integrity. You can find these essential Gibson-style nuts here: StewMac Truss Rod Adjusting Nut for Gibson (Amazon).
    3. No Lube for Adhesion.
      A testament to his foresight, Dan advises using minimal to no lubrication when cutting new threads with the die. His reasoning: “the less you use any lube the better chance you have for any kind of wood plug you want to glue in or whatever is happening.” This nuance ensures optimal adhesion for any potential future repairs or plugs, highlighting a comprehensive view of instrument integrity.
    4. The “Sleeve” Secret.
      Dan uses **blue masking tape wrapped around the truss rod** during installation, calling it a “sleeve.” This simple, unconventional trick prevents glue from sticking to the rod, ensuring it can function freely without binding—a detail that safeguards future adjustments.
    5. The Magnet “Trade Secret”.
      After using the 3/8″ cutter to expose the rod, Dan uses a simple **magnet to easily pull the cutter out** from the newly created pocket. It’s a small detail, but one that adds to the efficiency and reduces frustration during the process.

    ✨ The Critical Pro Step: Helping the Rod Adjust

    Perhaps Dan’s most emphasized and often “overlooked” technique is “helping the rod adjust.” He asserts that he “just don’t understand” why so many people omit it, as it’s vital for a successful, low-stress adjustment, especially post-repair. This method prevents the truss rod nut from doing all the work by himself and risking further damage:

    1. Loosen the Truss Rod Nut First.
      Always begin by completely loosening the truss rod nut.
    2. Backbow the Neck.
      This is the crucial step. You actively bend the neck into a slight backbow (reverse curve). Dan has evolved his methods over the years, from using his dad’s carpenter’s level to custom-made boards. Today, he often employs **3D-printed aids**, like specialized barbs that slide under the strings to create this controlled curve. (While it’s not confirmed these specific jigs are from them, resources like The Looth Group on Patreon are known for providing excellent 3D-printer files for similar professional-grade luthier jigs, showcasing this modern approach.)
    3. Tighten the Rod.
      Only *after* the neck is manually brought into a backbow do you then tighten the truss rod nut. This allows the rod to adjust into position with significantly less strain on the nut and its newly cut threads, greatly increasing the longevity and effectiveness of the repair. It essentially means “we’re taking all the tension off of the nut; we’re helping the rod along.”

    🏆 The Payoff: A Revived Instrument, Confident Hands

    The successful repair of a broken truss rod, once considered a catastrophic event, is now within reach for the serious hobbyist. Following Dan Erlewine’s methods and utilizing the right tools transforms a complex, high-risk job into a satisfying win.

    Your guitar neck will feel right again, the action will be dialed, and the satisfaction of performing a truly professional-level repair yourself is immeasurable. This empowers you not just to fix your instrument, but to become a better, more confident craftsman.

    Every luthier has a horror story about a broken truss rod. What single method or tool finally allowed you to conquer yours? Share your experience below.

  • Is Your Guitar Nut the Bottleneck to Perfect Tone?

    You look down at your guitar’s nut and it’s a chaotic landscape.

    A close-up view of a poorly-cut, damaged guitar nut, showing irregular string slots.

    Photo: TorrentFox at English Wikipedia, CC BY 2.5, via Wikimedia Commons

    The low E string swims side-to-side in its slot while the G-string binds and pings when you tune. Even worse, the high E has worn down so far it’s buzzing open against the first fret, killing notes completely. This isn’t just sloppy—it’s the physical bottleneck holding back your guitar from its true potential. The hard truth is that the stock nut on most guitars is compromising your tone, feel, and tuning stability. I’m not a professional luthier, and maybe you aren’t either. But I believe that we, the serious hobbyists, can achieve results that even pros would respect. The key is to follow a proven process and use the right tools—removing our own limited skill as a variable. This guide is the result of obsessive research, designed to be a blueprint for a professional-level upgrade, even for those of us still on the journey.

    📚 The Masterclass: Dan Erlewine Shows the Way

    Your time is your most valuable asset. So instead of reinventing the wheel, we’re going to look to a master for the solution. Dan Erlewine from StewMac walks through the essential technique for fitting a preshaped nut in this video. This is the fix. The principles he teaches are universal, authoritative, and the key to getting this job done right.

    🛠️ The Real Investment: Ensuring the Tools Aren’t Holding You Back

    As you saw, a pre-slotted nut gets you 90% of the way there, but perfecting that last 10%—filing the slots to the perfect depth—is what separates a good job from a great one. This is where a “buy once, cry once” investment is non-negotiable. I want pro tools so I know, with absolute certainty, that with my limited skill, at least the tools aren’t holding me back. The heart of any professional setup is a set of precision-gauged files. Investing in the StewMac Gauged Nut Slotting File Set for Electric Guitar, for Medium Strings – Set of 6 (Amazon) is an investment in certainty. These files are engineered to match specific string sizes, removing the guesswork and ensuring a clean, binding-free slot every time. It’s the difference between a hack job and a professional result.

    The StewMac Gauged Nut Slotting File Set, showing the set of 6 precision files for a professional nut job.

    To apply Dan’s flawless technique to the best available component, our recommendation is the StewMac Slotted Unbleached Bone Nut, for Fender (Amazon).

    ✅ The Professional’s Playbook: Four Details to Adopt for a Flawless Job

    With the right component and the right tools, the final step is to adopt the process of a professional. These are the details that matter.

    1. Protect the Investment First.
      Before a single file touches the guitar, a pro protects the finish. The method is a two-tape system: first, a layer of low-tack drafting tape directly on the finish, followed by a heavier-duty tape over it. Thank God for details like this—it can save an original finish from a disastrous slip.
    2. Use the Fretboard as the Jig.
      To ensure the nut’s bottom perfectly matches the fretboard radius, we can use Dan Erlewine’s elegant trick. Stick a piece of 80- or 120-grit sandpaper directly onto the fretboard (between the nut and the tuners) and gently sand the bottom of the nut against it. The fretboard itself becomes the perfect template.
    3. Think Like a Repairman, Not an Assembler.
      Most of us have reached for super glue. A pro thinks differently. The goal is a firm connection that is also serviceable. A few drops of shellac are all you need. It provides a solid bond but “will come apart easier if you want to take it out later.”
    4. Calibrate the System.
      Use a precision gauge like the StewMac String Action Gauge (Amazon) to perform the final and most critical step: the “balancing act.” The string height at the nut must work in harmony with the string radius at the bridge. This holistic view is the key to a setup that feels right across the entire neck.

    ✨ The Payoff: The Sound of a Job Done Right

    Plug it in. Strum a chord. The sound is clearer, the sustain is richer. The feel is consistent. But the real prize is the profound satisfaction of knowing you did it. You, the dedicated enthusiast, achieved a professional result because you followed a professional process.

    Every luthier has a story about a stubborn guitar nut. What’s yours? Join the discussion below.